Makeup For Guide Beginners

The lists of reasons people have for wearing makeup are as long and complex as the history of cosmetics itself. This is a guide to makeup for beginners, so if you’re new to cosmetics, you’re in the right place. You might also be wondering what some more modern motivations are. Yes, sometimes it’s the pressure of aspiring to unrealistic beauty standards - but alternately, makeup can boost confidence, enabling you to play up your favourite features - and it’s also fun to play with!
Makeup 101
If you are totally new to the game and not sure where to start, don’t feel discouraged: we’re going to break it down step by step. You don’t have to do all of these if you don’t want to - at this point it’s all about experimenting and finding a makeup routine that works for you, not following instructions word for word. So let’s dive in:
1. Skin Prep
First things first: skin care is important, makeup or not - so whether you follow a 12-step routine or just opt for the tried-and-true formula of “cleanse, tone and moisturise”, find the products that fit your particular skin type, but remember to always wear your trusted SPF!
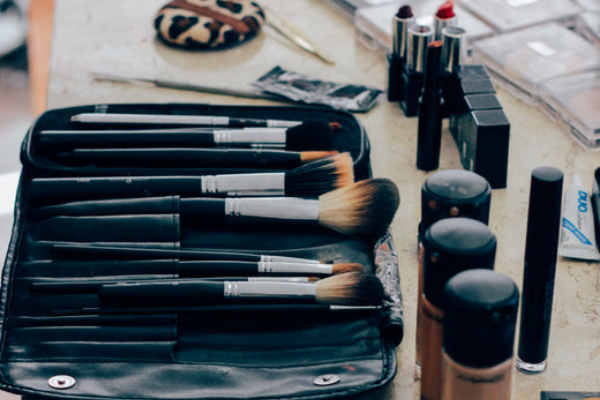
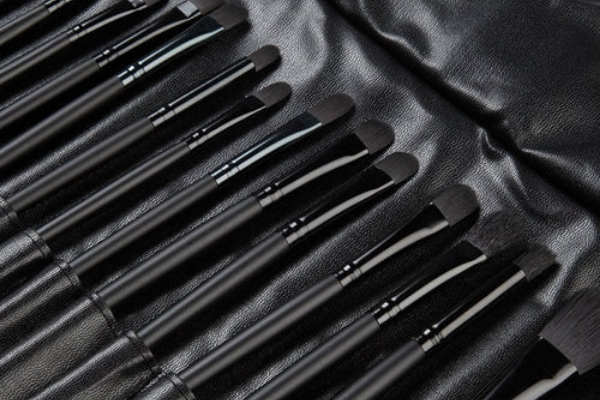
2. Tools
A luxury makeup brush set is a long-term investment - but for starters, a cheaper set will help you figure out which tools you enjoy using and which ones aren’t for you. Remember to clean them once a week, minimum.
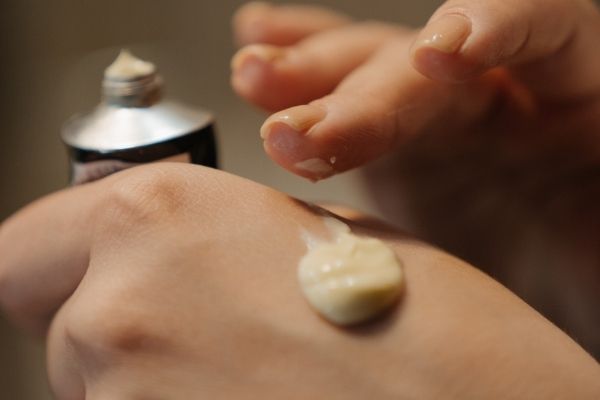
3. Primer
Primer works to create a smooth surface and to ensure the rest of your makeup adheres to the skin. It’s quite a recent addition to the beauty world - and whether or not you decide to use it depends on what lies beneath - for oily skin where foundation tends to dissipate within hours, it adds sticking power - while drier skins can also benefit from hydrating formulas. Apply with a clean finger, a makeup brush or sponge, starting in the centre of your face and blending out.
4. Base Notes
This comes in a range of formulas, so we’ll start with the lightest first. Your base could be:
- Moisturiser
- Tinted moisturiser (for a hint of colour)
- A buildable mineral powder (this one can be a little tricky to finesse, so perhaps save it for later use if you’re a total makeup newbie)
- A BB cream or CC cream (the latter is slightly heavier, both claim to have additional skincare benefits)
- A medium coverage foundation, which acts as an intermediary between lighter formulas and the last one, which is:
- Full coverage foundation - while not always heavy, this is definitely heavy-duty.
How you apply your base depends on your preferred look: some prefer to use foundation brushes, others plump for beauty blenders: for a more natural finish, dot on the foundation and rub your hands briskly to warm them before applying up to the hairline and blending down the neck. For powder foundation, use a blunt-bristled kabuki brush to buff the colour out.
5. Colour
Finding the right shade of foundation can be a bit challenging if you’ve never done it before. Pre-Covid, the usual way was to head to the nearest cosmetics counter, but since (for obvious reasons) in store makeup testing is less common, consider finding a few free samples online to try at home (that way you’ll also be under natural lighting). Choose a colour that works with your natural undertones for the best result, and test it along your jaw and neck: if it blends seamlessly into the skin, you’re onto a winner. This website is also a fabulous tool to use if you’re trying to find the right shade for you. Remember to always do a patch test in case of allergies.
6. Brows
What 2020s makeup tutorial would this is if we didn’t mention brows? While these days the trend is for fluffy, full eyebrows, not all of us are naturally blessed (particularly if you’re old enough to have lived through the skinny eyebrow trend in the nineties). While some serums claim (with varying results) to help you regain Lily Collins levels of fullness in the brow department, faking it is also another option. To see how, first assess what your face shape is, as this will help you to see what shape brow will look most flattering on you. As the fluffy brow trends has gained traction over the years, multiple products and treatments have become increasingly common: threading, pomades, brow pencils and even brow tattoos - but if you’re an absolute beginner, keep it simple: map out your brow shape using a brow pencil. In terms of colour, keep it neutral and pay attention to whether your hair and brows are warm (i.e. redheads) or cool toned.
7. Concealer
Concealer isn’t just for blemishes: it can also act as a highlight when contouring (which we’ll come to in a minute). If that’s the case, consider getting two shades - one to match your skin tone and a lighter shade for highlighting. Colour correctors - while a bit daunting at first glance - can also work miracles by helping to balance out features like dark circles and overly-ruddy complexions. Concealer can come in a liquid, cream or powder formula, but either way use a light touch: your ring or middle finger tends to apply less pressure than your index. Apply sparingly, and tap to blend before adding a light dusting of powder to set.
8. Blush
Blush is the unsung hero of the makeup box: instantly brightening up the face with a sweep of a brush, stick or fingertip (depending on the formula). Again, skin tone is key here, so for fair skins, go for pinky-peach colour that will perk up your complexion. Medium skin tones work well with deeper versions of the above - while darker skin tones with cool undertones suit deeper pinks or berry shades - and if your complexion is warmer, go for tangerine or brown tones. Placement here is everything so again, pay attention to your face shape and where your blush would look most flattering.
9. Bronzer
Bronzer should be two shades darker than your natural skin at most - and if you’re fair, avoid warmer shades as they tend to look unnatural (pink golden tones are best). Dust sparingly where the sun naturally falls on your face, i.e. the temples, the apples of your cheeks and chin. Bronzer can also be used for the next step.
10. Contouring and Highlight
If you’re new to the world of contouring, don’t be alarmed - we have an in-depth guide on contouring for beginners - but in basic terms it’s all about bringing features either forward or back: brightness makes certain features appear more prominent, while shadow makes others recede. Again, application depends on face shape as seen here. Contour products come in various shades and formulations but if you want to try a softer “beginner’s version”, try using a little of your bronzer (or a taupe eyeshadow) as shade, and use your lightest concealer as highlight.
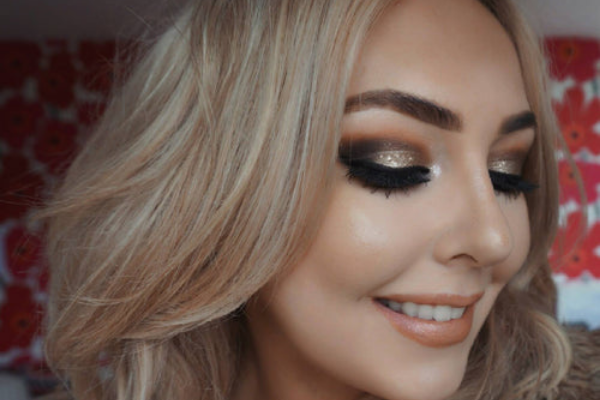
11. Eyeshadow
We’ve got a more in-depth guide on eyeshadow, but for starters, consider sticking to a neutral palette, adding a light base shade first to the lid before shading in the crease of the eye with a darker tone. Pay attention to the shape of your eyes: if yours are hooded, you may need to place your colour a little higher on the lid. Highlight the corners and browbone with the lightest, shimmery shade.
12. Eyeliner
If a full-on cat eye is not quite within reach yet, don’t despair: the easiest way to define your eyes is with a soft, glideable pencil you can correct easily with a q-tip. Dot and then dash the colour along your upper lash line, taking care not to pull the delicate skin around your eyes. Use underneath if you want to go for a more smokey eye, and soften the line using a tiny blending brush.
13. Mascara
For this guide, we’re not going all-out with lashes just yet. Keep things simple by choosing a mascara. These come in a range of formulas - lengthening, volumising or waterproof - so pick one that suits - and if you’re blonde, opt for a brown shade over black, as the latter tends to look rather harsh. An optional step is to use a lash curler - but if you prefer you can just stick with mascara for now. Wipe the wand on a clean piece of tissue to avoid clumps and wiggle into the lash line, repeating the motion as you pull the wand towards the tips of your lashes. For any pesky remaining clumps, use a lash comb.
14. Lips
For the lips, you may just wish to stick to a tinted lip balm - but if you are looking to try out lipstick, blogger Amanda Holstein suggests dabbing your chosen colour on the lower lip before rubbing your lips together before finishing with a touch of lip gloss. Choose a fairly neutral shade to begin with: darker or brighter shades usually require a little more work.
15: All Set!
Finally, fix your makeup in place with a dusting of setting powder (if desired) and a light mist of setting spray. These tend to come in either dewy or matte formulas - so choose depending on which type of look you’re going for. And that’s it - you’re all done. Congratulations, beauty newbie - and welcome to the wonderful world of makeup!


Comments